Editing a Video Animation for Thumby
This tutorial details how to display an animation on Thumby from how to edit the video itself, to the final step of uploading the animation! The animation highlighted in this tutorial was first shared here:
@tinycircuits Coding Permission to Dance on Thumby for Jimin’s birthday. Happy 26th Jimin! #jimin #bts #jiminbirthday #thumby #tinycircuits #fyp ♬ original sound - TinyCircuits
This tutorial will involve some video editing and programming.
Download Shotcut
Download the video editing software Shotcut. Once downloaded, open the app and create a project file.
Import the video you want to see on Thumby. If you want to follow along with this tutorial, you can download the video we used.
Edit video to only black and white
For this, we will need to add some filters to achieve a fully black and white video. Keep in mind that this process will require more steps if your video contains a lot of colors or doesn't have a solid color background.
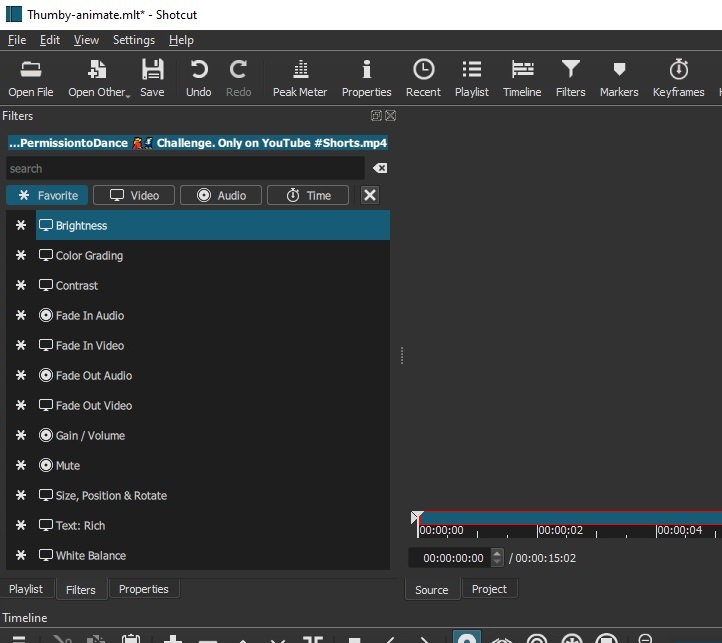
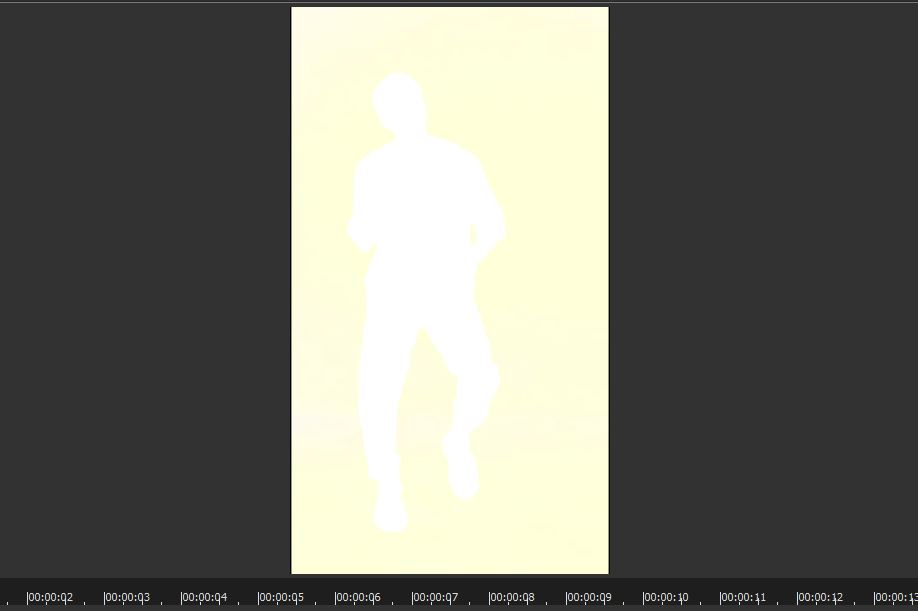
To accomplish this, we will use the Shotcut filter Hue/Lightness/Saturation to adjust the saturation, lightness, and hue values. When edited correctly, the video video should appear so saturated and brightened that you only see two colors.
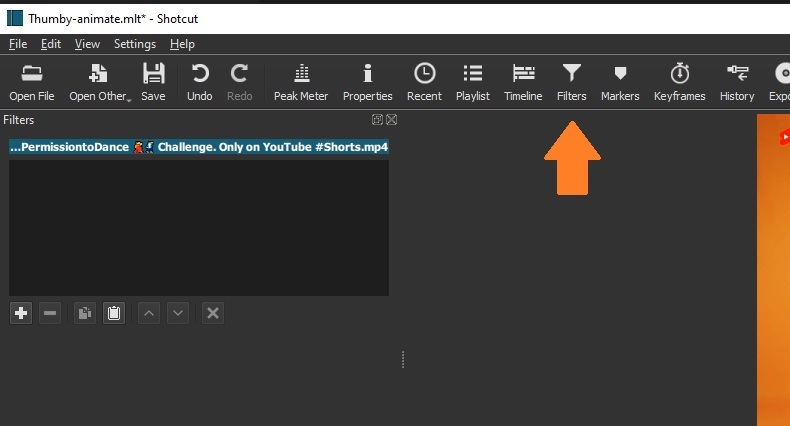
Navigate to the filters list to locate Hue/Lightness/Saturation:

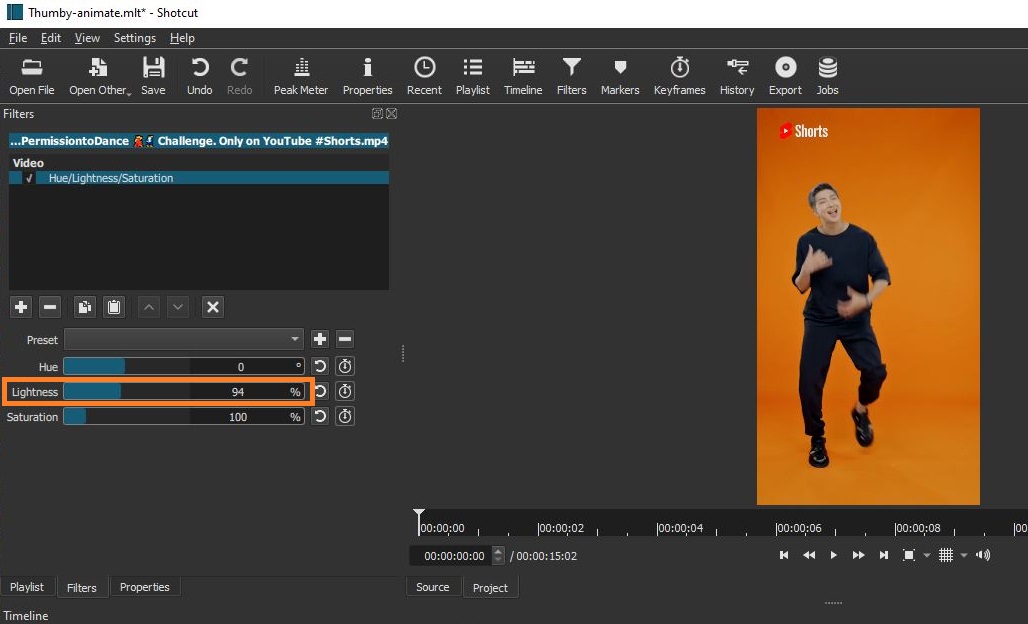
For this video, the orange background became a very light yellow so it may be difficult to distinguish that there are two colors after applying the following settings:
- Hue: -21
- Lightness: 200 (max)
- Saturation: 100
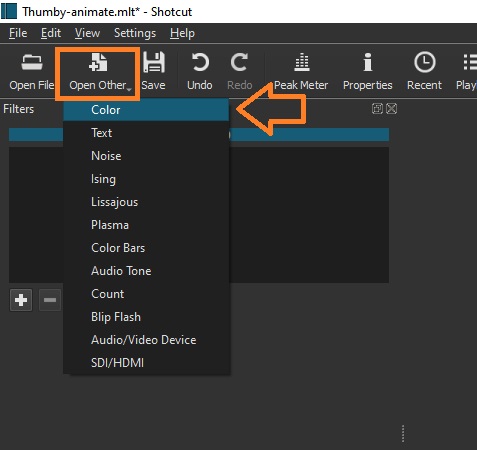
Now we need to make the video appear as just black and white. To do this, we will first key out the light-yellow background color and then add a black video to replace the background. Search for the Chroma Key: Simple filter. Once open, take the color dropper tool and select the background, in this case the light yellow. Nothing will visually change here until we layer in some black footage. To do this, select the Open Other dropdown in the top left, and press Color:
Select the color black and press OK to add it:

From there, you can move the black track to a separate Output and extend it to match the length of the animation. Move the black footage to Output V1 and the animation to Output V2 so that the animation is layered on top of the black footage:
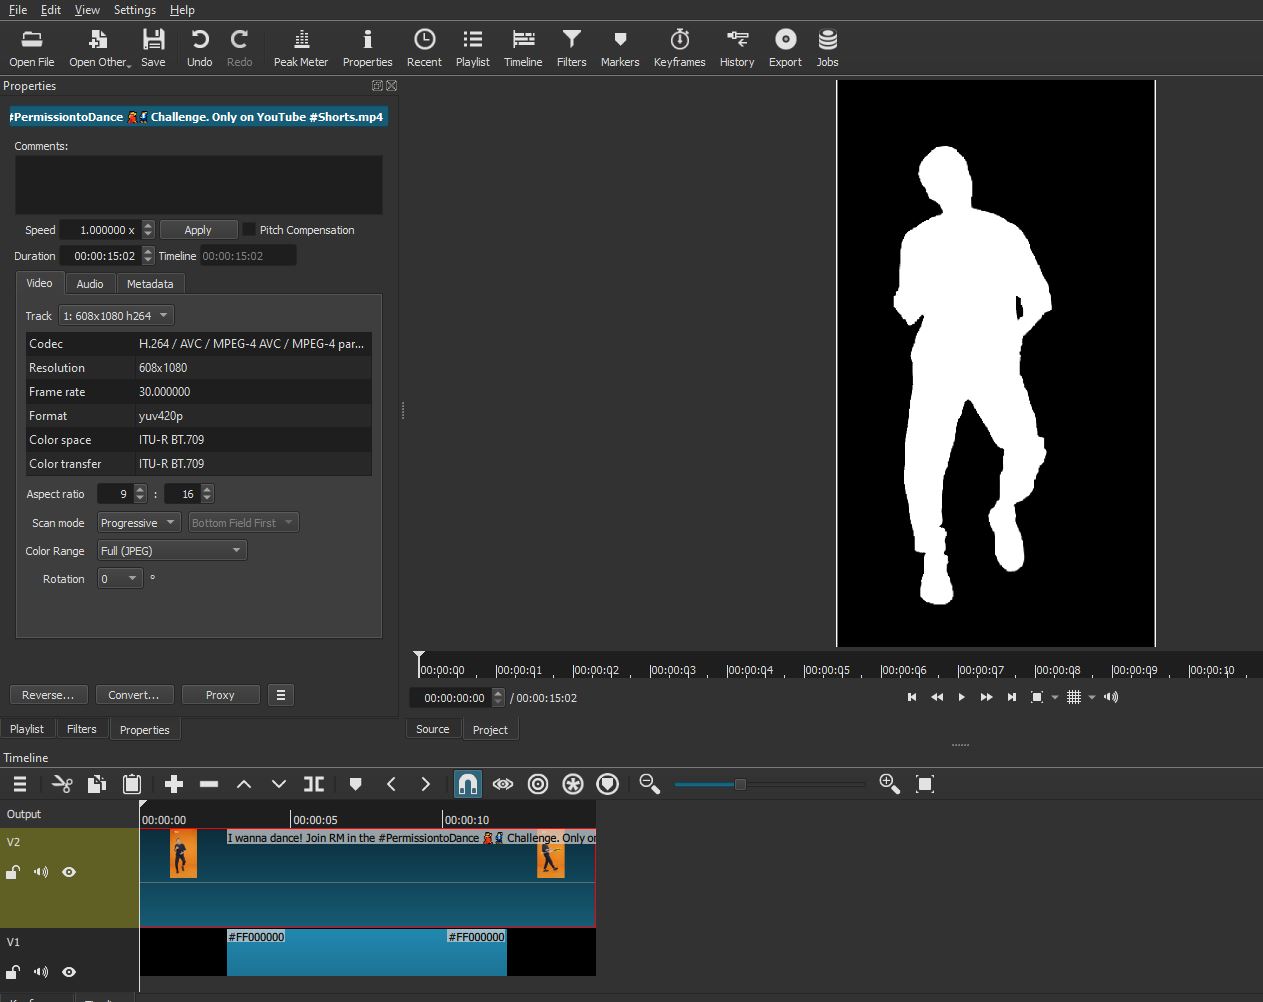
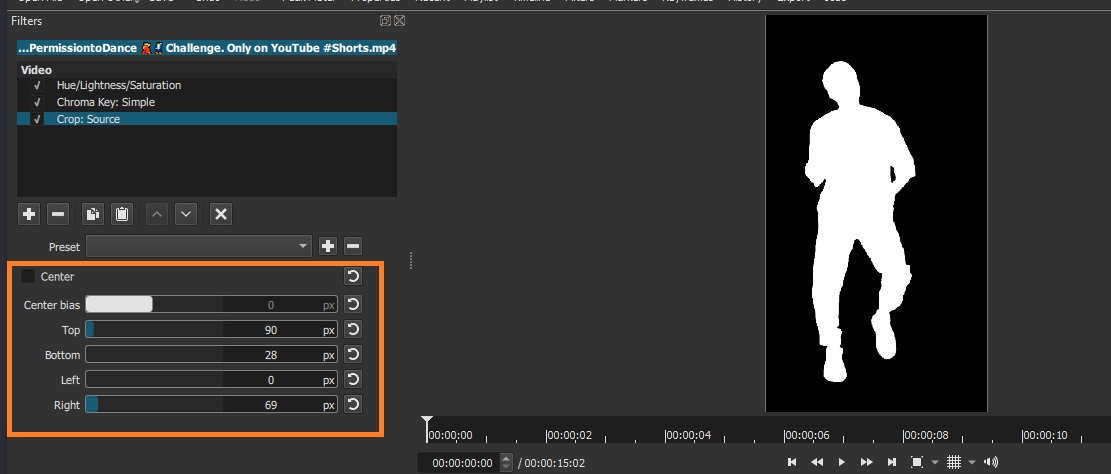
The last filter to add would be Crop: Source to remove the YouTube watermark and resize the video to better fit the Thumby screen dimensions of 72×40 pixels:
Rotate the video and scale it
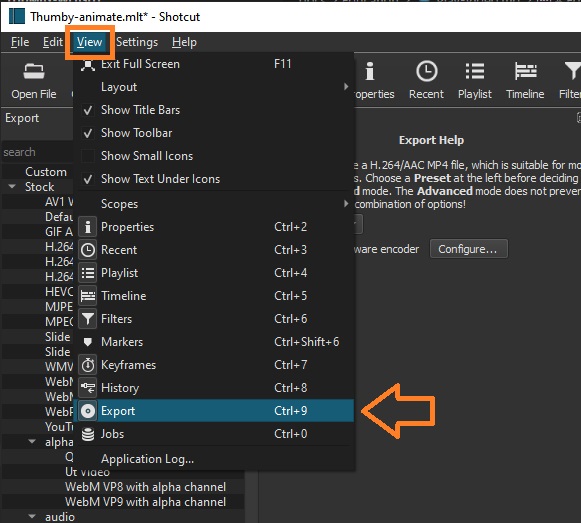
The Thumby screen is a typical wide rectangle, so to make this tall phone-style video fit onto the screen better, we will need to rotate and scale it before exporting it. Click on View and select Export:
Once the settings are open, change the Aspect ratio values to 72 and 40 and set the Rotation to 90. Click on Convert and then press OK on the window that opens to export the modified video:
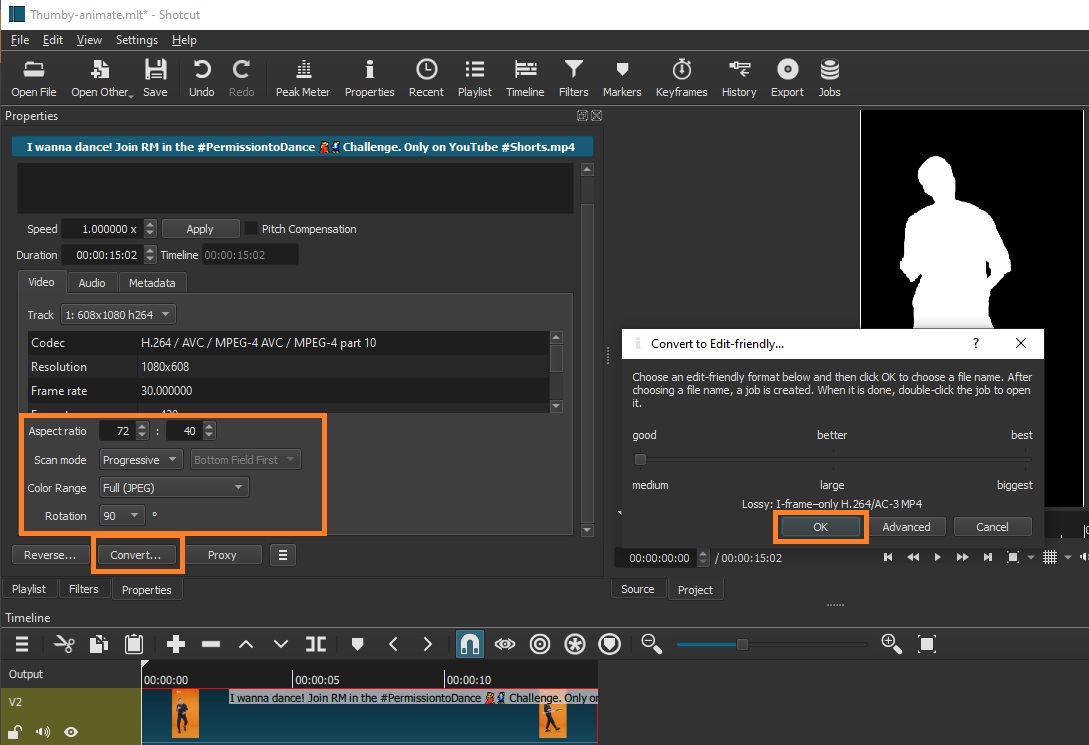
Name the edited video DancingAnimation-edited.mp4 so that it will be compatible with the program used in the next step.
Convert MP4 to Bitmap
To make the animation compatible with Thumby, we will want the video in terms of bitmaps. Use the following program ConvertMP4ToMPBitmaps.py to generate the video.raw file that will be used in the next, final step to get the video onto Thumby.
To use this program, you will need python installed on your computer. Download the python file to your computer, put the DancingAnimation-edited.mp4 file in the same folder as the python file. Once the python file and DancingAnimation-edited.mp4 are in the same folder, you should be able to double click the python file and it will run the following script to convert the DancingAnimation-edited.mp4 file to video.raw:
import cv2

print("Started")

video = cv2.VideoCapture('DancingAnimation-edited.mp4')
success, image = video.read()
frameCount = 0

EXPECTED_WIDTH = 72
EXPECTED_HEIGHT = 40
WHITE_THRESHOLD = 200

file = open("video.raw", 'wb')

while success:
    height, width, channels = image.shape
    frameBytes = []

    for y in range(0, EXPECTED_HEIGHT, 8):
        for x in range(0, EXPECTED_WIDTH, 1):
            byte = 0b00000000
            for i in range(0, 8, 1):
                if image[y+i, x, 0] > WHITE_THRESHOLD or image[y+i, x, 1] > WHITE_THRESHOLD or image[y+i, x, 2] > WHITE_THRESHOLD:
                    byte = byte | (1 << i)
                else:
                    byte = byte & ~(1 << i)
            frameBytes.append(byte)

    file.write(bytes(bytearray(frameBytes)))

    success, image = video.read()
    frameCount += 1
    print('Read a new frame: ', frameCount)

file.close()

print("")
print("Ended:")
print("   Frame count: ", frameCount)
print("   Total frame bytes (kB): ", (frameCount * 360)/1000)

print("")
print("############################################")
print("")
print("Data output to: video.raw")
print("")
If the python file doesn't produce a video.raw file, you may need to download the python module cv2 - to do this, first download pip and then open a command prompt and type one of the following install commands that will work for your python version and machine:
# 👇️ in a virtual environment or using Python 2
pip install opencv-python

# 👇️ for python 3 (could also be pip3.10 depending on your version)
pip3 install opencv-python

# 👇️ if you get permissions error
sudo pip3 install opencv-python

# 👇️ if you don't have pip in your PATH environment variable
python -m pip install opencv-python

# 👇️ for python 3 (could also be pip3.10 depending on your version)
python3 -m pip install opencv-python

# 👇️ for Anaconda
conda install -c conda-forge opencv

# Above install options sourced from: https://bobbyhadz.com/blog/python-no-module-named-cv2
Upload the .raw video to Thumby
Use the following program in the Thumby Code Editor to play the video.raw animation. If you're unfamiliar with the Thumby Code Editor, it may help to go through the Getting Started tutorial.
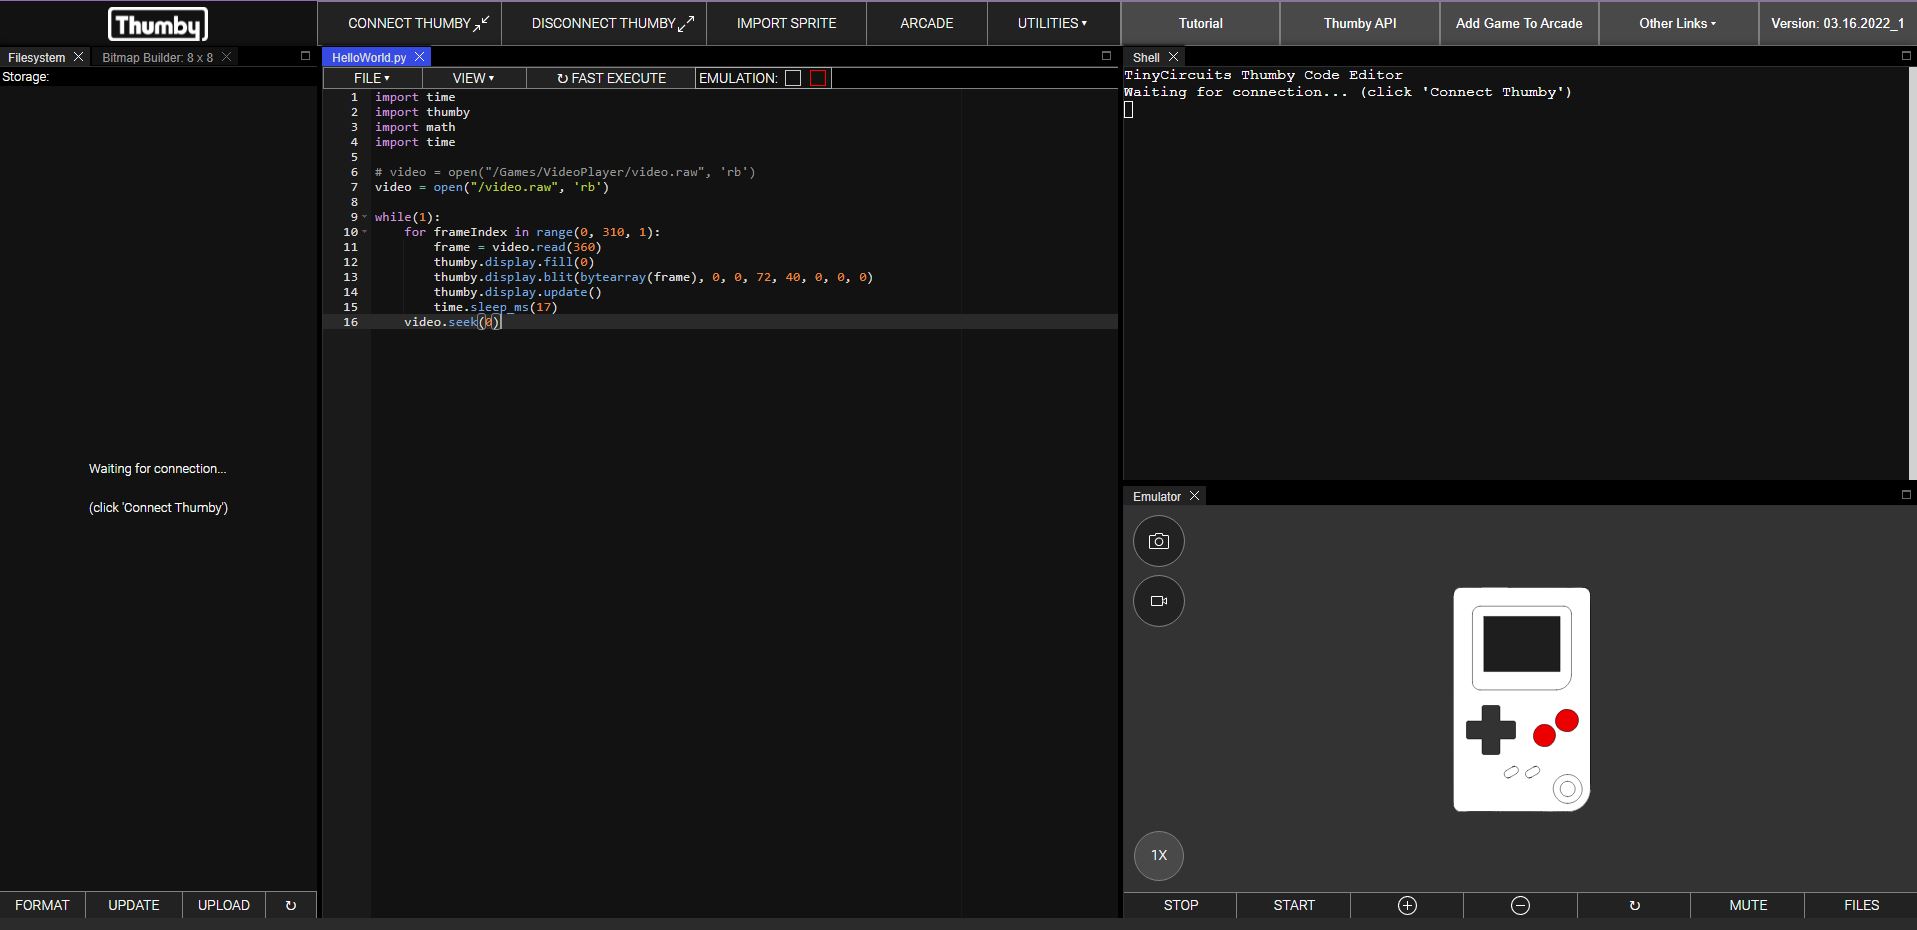
Copy the below code and paste it into the Editor section of the site:
import time
import thumby
import math
import time

# video = open("/Games/VideoPlayer/video.raw", 'rb')
video = open("/video.raw", 'rb')

while(1):
    for frameIndex in range(0, 310, 1):
        frame = video.read(360)
        thumby.display.fill(0)
        thumby.display.blit(bytearray(frame), 0, 0, 72, 40, 0, 0, 0)
        thumby.display.update()
        time.sleep_ms(17)
    video.seek(0)
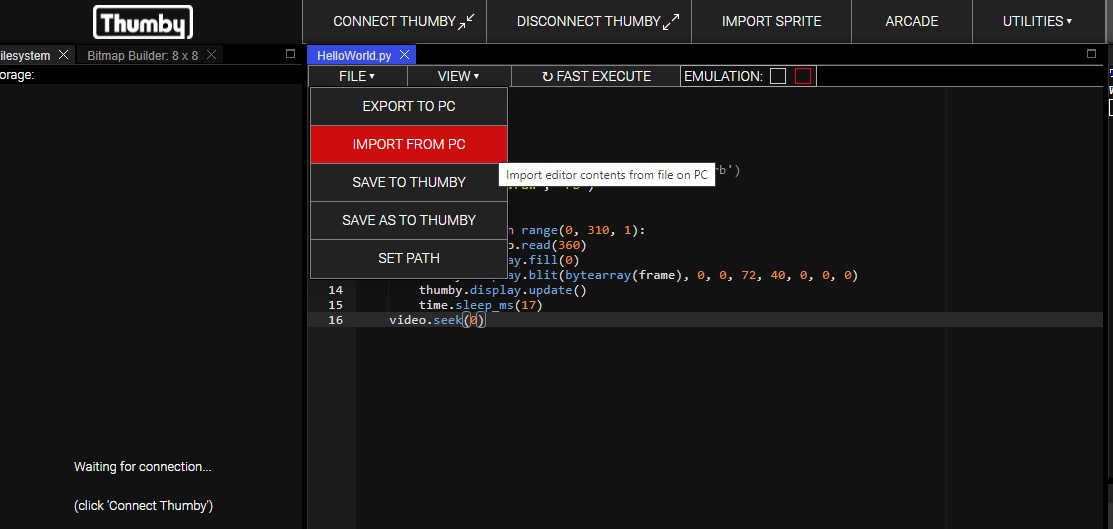
Then select File and Import from PC to import the video.raw file:
Make sure the file path on line 6 or 7 is pointing to the correct location, whether you have the video.raw file just in the emulator, or if you later add it to a folder on the Thumby hardware.
That's everything! You can emulate the animation directly in the Code Editor, or you can download it to your Thumby.